Wednesday, May 22, 2013

Ribbon storage

I've got a friend with a habit. A ribbon habit. She makes gorgeous hair bows and diaper cakes over at Little Nena Designs, but her stash was taking over.

She saw this ribbon storage unit from Nicole Heady and asked if I could help her to make one of her own. 
The stash has been tamed.


We had quite an...erm...active trip to Home Depot with three hungry little girls in tow. It took a second trip on my own to locate the correct type of crown molding. After an hour of arguing with the guys there that it did indeed exist, I found what I was looking for and got the only piece in the whole store.

Empty shelves, crying out for ribbons
After that, the assembly was very straightforward. If you tackle this project for yourself, I'd recommend either just gluing and clamping the molding to the shelf edges, or predrilling the nail holes with a 1/16 bit. I split one piece trying to bang in the finish nails, which is why the unit only has 5 shelves instead of 6.

Tuesday, May 21, 2013

End Table Dog Kennel

A little dog recently waggled his way into our lives. He's got some anxiety issues from his previous home, but he's the sweetest guy I could wish for. It seemed fitting to make him a comfy safe place to stay when we are out, but storebought crates are so unsightly.

New safe place.


When I saw this plan on Ana White's site, I knew that with some modification it would be perfect for him. Her kennel was much too large, both for my space and for the dog, so I cut it down to approximate the dimensions of the end table by the sofa. The overall finished size is about 22" tall, 24" wide, and 27" deep.

The crate before adding the top.
I spent a bit of time figuring out the new dimensions and drawing them out on paper. For the rails, I had some modling strips on hand, so I used those for the vertical sections to add a bit of visual interest. I also thought that the side panels could use some jazzing up, so I wrapped the 1/4 inch ply with some fabric fat quarters that I'd found for 99c. They'd been sitting in a drawer just waiting for the right project. I used my trusty staple gun to attach the fabric. I could have gone with Modge Podge, but wanted the option to change out if I changed my mind/decor. I used the leftover paint from my shoe bench and coffee table to tie it together with the rest of the room.

"Why can't I just sleep on the sofa while you're out? I'll be good. Promise."
I opted to forgo putting a bottom on it. We will be moving  again (twice) in the next few weeks, so I wanted to make it easy to disassemble. The sides and top are attached with small corner brackets on the inside. It stacks together in 5 flat pieces. He's got a fleecy pad in the bottom and his toys in there to make it cozy. He still doesn't love being crated, but is getting better with it each day.

Quick custom wall frame

I took a photo of a place that is special to me and had it enlarged, but was having trouble finding a suitable frame for it. I got tired of it being stuck to the wall with BluTak so, I made a frame. This was one of those projects that went from idea to completion in the span of an evening.


This is a really simple little thing that you can knock together in less than an hour, and it's really cheap. The photo or poster is held in place by strong magnets. I picked these up at Home Depot for about $1.69 for 12. All of the other materials were already on hand.

For mine, I used scrap 1x2 furring strips. Simply measure the dimensions of your poster, and use a hand mitre saw to cut four pieces with the ends at 45 degree angles; the angles should open away from each other on each piece of wood - each of your side pieces will make a trapezoid shape, not a parallelogram. The length of the wood on the short side of each parallelogram should correspond to the the size of your opening.
Cutting the 45 angles with my little mitre box.


My photo is 20" x 30". Here's where I went wrong and had to dismantle the whole thing: I made the inside of the frame 20" x 30". The problem is that then there was no overlap. Now, this didn't twig until I went to attach the poster, so then I had to cut my lovely joints apart and make my angled cuts all over again.

To assemble the frame, just apply some wood glue to the edges and a finish nail at each corner. My wood was quite tough, so I had to pre-drill my holes with a 1/16 bit. I used some Gorilla glue to attach a magnet to each corner. I put a piece of newspaper between my magnet and my clamp while the glue dried, just to make sure that I didn't accidentally glue the clamp to the frame - that stuff will hold anything.

While the glue dried, I put scraps in each corner to make sure that it stayed square in case it got bumped. I'm clumsy. 
I liked the unfinished look of the wood with the photo, but the frame would also look great stained or painted. My scraps were two colors, so I did one color for the sides and the other for the top and bottom. For hanging, I had one of those picture hanging sets languishing in a drawer. You know the ones that never have enough of the right pieces to hang things, so you end up with a random assortment of eye hooks and no nails. I screwed two of the eye hooks into the top of the frame and  strung some wire from the kit through them. You could also attach the wire along the back to keep it out of sight, but I wanted a more industrial look for this frame.

Thursday, May 09, 2013

Pallet Entry Bench with Shoe Storage


After tripping over shoes in our tiny entry for the umpteenth time, I decided to make use of the pallet stash leftover from my headboard. After looking around for inspiration on Pinterest and the web, nothing seemed to meet my needs. So, I figured out the dimensions that I wanted the bench to be and got to work designing my own.

The bottom compartment needed to be the right size to accomodate the fabric bins I'd spotted at Target, and for the height to be right for big and little people to sit on while putting on their shoes. The other consideration was to make sure that it didn't interfere with the door opening. The middle shelf is useful for handbags and the dog leash. Somehow, I calculated the height of the bottom shelf about 1/4 inch too low for the bins to slide comfortably, but some little rectangular felt furniture pads (also from Target) sorted it right out, and now I can slide the bench out to sweep without scratching the tile.

The entire thing is made from pallet wood, with the exception of the scrap 2x2's used to support the middle shelf. I used deck screws for the assmbly.  After sanding, the leftover paint from the coffee table came in handy. Since everything was leftovers, the entire cost of the bench was only the cost of the bins and feet - under $20! Our entry stays nice and tidy now.

Saturday, May 04, 2013

Call me Handy Smurf

This post could also have been titled, "I should really know better than to do stupid shit like this, and I know you are much smarter..."

Last week I rescued a cane patio set from beside the dumpster. It came in installments. One day, a loveseat appeared, and after I scavenged that, a few days later 2 chairs and a table were in its place. The table was in bad shape, and I do have some dumpster diving standards, so I left it. Besides, I already have my awesome palm stump table.

Here's where the stupid part comes in. I picked up some spray paint from Home Depot. Not wanting to accidentally spray my patio, I decided to go out on the communal grass patch behind the house to do it. I put down plastic sheeting and weighted the edges down with scrap lumber to stop it blowing in the wind.

Wait. What's that you say? If it's windy enough for the drop cloth to be blowing around, then maybe it's too windy to paint?

Well, why the hell didn't you speak up sooner?

I went for a navy on the chairs and a turquoise on the bench to pick up the colors on the palm table. Naturally, I didn't buy enough cans and will have to make another run to HD tomorrow. When I finished, I carried on working on another project and then video chatted with the other Junk Jedi. It was only then that I realized that I looked like a damned smurf. It's no wonder my paint didn't go as far as I'd hoped. There was a fine dusting all over me. My face, my arms, my ears, and even a blue tan line where my flip flops were.

Later on while in the shower, a thought occurred to me. I was performing a thorough scrub with my Yardley of London soap, raw sugar, and an old cloth (now blue) when I realized that tomorrow I have to finish the second coat.

Thursday, May 02, 2013

Pallet Headboard

This headboard for my storage bed was made from a pallet and some stud scraps that I scavenged from a trash pile on a construction site. The wood was perfectly fine, but had a number of nails that had been badly driven. It took more time to prise them out than it did to build the thing. Deconstructing the pallets took hours. Some of those nails are really stubborn. For the worst ones, I just cut them off flush with the support beams using my Dremel tool.

I didn't use a pattern for the headboard, but probably should have. I let the lengths of available wood dictate the dimensions. I knew how wide my bed was, and estimated how high it would need to be when I got a mattress. The height of my studs worked out pretty well for the uprights. The horizontal parts of the frame are the supports from my pallet. I just laid the whole thing out on the ground and made my cuts. The bottom of the headboard is hidden behind the bed, so I didn't bother tidying up the lengths of the pallet boards- I just used them as they were.

When I laid it all out, it seemed like a good idea, but the assembly fell apart when I stood it up. F@ck.

So, I had to reconfigure the construction of the whole thing. I eventually settled on making a frame using pocket holes, then attaching the pallet boards to the back using wood glue and finish nails. My pocket holes were constructed using one of the little $20 Kreg mini pocket jigs. The top shelf was attached to the frame with wood glue and some decking screws. I filled all the holes with wood filler before sanding and painting.

Like the mattress before it, there was some swearing as I hauled it up the stairs by myself. My kuckles were a little bloodied, but the walls remained intact. As for attaching it to the bed, I considered putting it on brackets attached to the back of the bed to make it higher. In the end, I decided not to mess with it, and just wedged the sucker in behind the bed and rammed the bed against the wall. It's sturdy and doesn't budge, no matter what happens. Win!

Since I scored the lamps (that miraculously match my throw and shams) at Goodwill for $8 apiece, I'm all good in the lighting department. However, the shelf on the headboard would make a nice place to mount some reading lamps.

Probably the prettiest pallet I've ever seen.
Awaiting paint.


One coat of paint to go.

Monday, April 29, 2013

Get Thee to Bed


Look at all that glorious storage that I'm not using yet. But I can, and that's what's important.

This is the story of a long-awaited good night's sleep. For the first nearly three months of living in Florida, my daughter and I were kindly put up by some friends while we accumulated enough capital to get a car, some basic necessities, and find a place to rent. We snuggled up together in a double bed each night. As lovely as that was, sleeping with a 6-year-old is very similar to cuddling a bag of writhing snakes with elbows that often talks at 2am.

Midget wants to help. Note patient Home Depot guy ripping my boards.
After we moved into our own space, I spent the next 2 months on a single mattress on the floor, dreaming of a proper bed. I eventually built this lovely queen storage bed and pallet headboard, but slept with the single (twin) mattress on top. I finally saved up enough money for an Ikea run to get a queen mattress for the bed, and now it's perfect. I smile each time I walk into my room, and look forward to curling up with a book in bed each night. I'm now considering making some felt bins for underneath to add a little pop of color. Building drawers is another option.

The bed is based on the Queen Storage Bed over at Ana White's site. The bed is an awesome concept, and is essentially made of three seperate benches with supports in the middle.


Even though the plans make it quite inexpensive, I opted to use OSB for the backs and bottoms of the cubbies to save extra cash. I spent an evening redrawing all of the plans to get the most cuts out of the sheets. I went with plywood for the tops and visible ends of the benches so it looked better. Even including paint and screws, I think this baby came in at just over $200. Eat that, West Elm.

It's not as cute with the single mattress on it, but look at all those cubbies!
The bed was simple to make. It would have been simpler if my arms were 4 feet longer or if I'd had another pair of hands to help me hold stuff in place, but I got there in the end. There was a very patient guy at Home Depot that thought I was a little crazy when I showed him my cut plans for the sheets, but he spent about 45 minutes cutting them for me. 

After I put the benches and supports together, I primed and painted it. I opted for white for a bit of a clean sanctuary vibe.Then I enlisted the help of a big strong friend to get the pieces up the stairs. Man, those suckers are heavy. I should have asked him to stay while I screwed the support frame to the middle, but I opted to do it by myself. Cue much swearing. Months later, there was more colorful language as I dragged the mattress up the stairs by myself and got it stuck going around the landing. There was a lot of celebration when I finally got it on the bed. Midget and I did a little dance and high-fived each other for being tough, resourceful  chicks who can move things that weigh almost as much as they do. After that, I was so ready to crawl onto the new mattress but had to wait until I'd showered and got out the fresh sheets. It was so worth it.

All this talk about my bed has made me want to go spend some quality time with it. I'll talk about the pallet headboard in a future post.


Friday, April 12, 2013

Bargain tunes

In previous posts, I've mentioned the amazing Goodwill superstore near me, where I found my coffee and end tables, kitchen table, and super bargain sofa. This one may be my best find yet.

Recently, Ace Hardware did another free quart of their lovely primer-paint combo. I had mine mixed in a beautiful turquoise. I plan on using it as the accent color, along with a splash of yellow, to go with my white and seaglass bedroom colors. While I was there, I also scored a quart of a nice pewter color for just a few bucks that was in the "oops" stack.  Now, obviously, a girl needs something to paint upon, so Goodwill was a great place to start.

I was looking for bedroom furniture, but found what I thought was a pretty cool sideboard. I have an extremely naked dining room and the price was a sweet $30. When I got closer, I noticed that it had a lift up section and when I opened it....BEHOLD!
 
It's an RCA Victor. It's has a record player and a stereo in it. There's even a gap that is the perfect size for holding one's vinyl. I was pretty sure it was the coolest thing ever, so I snagged the tag and bought it on the spot. The fun thing was trying to get it in the car. The guy in the loading dock was about as effective as a puppy, but thankfully there was a nice burly man impatiently waiting behind me that helped shove it into the back of my car. The sucker is really heavy.

My super awesome neighbors helped my get it into the house. I looked up the model number on the back and found out that it was a 1968 model. We plugged it in, and holy frijoles...IT STILL WORKS!! I thought it was only fitting to find the oldies channel. It even has the occasional pop and crackle from the speakers that makes music sound much more like art than overproduced pop stuff. Look at that- I buy a stereo that was made a full decade before I was born, and it makes me sound like a crotchety old person. "Back in my day, music was good. Not this noise that you kids listen to today. Now get off my lawn!"

Midget and I did some booty shaking to the Supremes and Marvin Gaye for a while. That's when I noticed the smoke smell. It had been masked by the overall eau du charity shop before, but now the reek started properly. I wiped it, I washed it with baking soda, I washed it with wood cleaner. I did it some more. The nicotine that came off of it was incredible. One end was much more heavily coated than the other, so I can just picture some man sitting in a chair next to it, smoking and listening to tunes for 30 years. Scrubbing the louvred speaker covers was an exercise in extreme patience. It did convince me that perhaps sanding it and painting it would be a nightmare.

For several days, if I sat on the computer working at the dining room table next to it, I had a raspy throat and my hair smelled of smoke. Not pretty. I kept wiping and washing, but the fade was only minimal. After consulting the internet, my last resort was to try OdoBan. I put a bowl of it out on top, a small container of it inside, and one underneath. The house smelled lovely. I let it sit for about a week and the smell/irritation was dramatically reduced. I poured away the OdoBan and the smell came back, but not as badly. I repeated for another week or so, and now the smell is almost gone. Hooray!


It's been over a month now, and I still smile every time I see it. There's music in the house, and it fits perfectly along the wall. I never did find anything to use my new paint on. Looks like another Goodwill trip may be in order...

Sunday, April 07, 2013

Tree stump table decor with Modge Podge

I used leftover paint from the blue and white table, along with some sale fabric to decorate my stump table.


Materials: paint, paintbrush, fabric, string, pencil, tape measure, scissors, Modge Podge, sponge brush
Watching paint dry

First, I painted a broad paint border around the top and edges of the table. I used my Ace Paint and Primer in one, but it took two coats because the wood was so porous. MDF or ply would probably only take one coat. I waited for it to dry, but thankfully that took about 20 minutes on a warm day. If your fabric is thin, I'd recommend painting the whole top in case the paint shows through the fabric. You don't want to see the paint border.

 I measured the diameter of the table, and decided how much of the paint border I wanted to show. I then subtracted twice that to get the diameter of the fabric circle I would need to cut.

Using the ever-handy pencil-on-a-string technique, I drew a circle on the backside of the fabric and cut it out. My fabric is a pretty robust one that was in the section at JoAnns where the patio fabrics are. If you're using something thinner, you may want to Modge Podge the fabric before cutting to prevent the edgesr from fraying.

I slathered a copious amount of Modge Podge on the table with the sponge brush and then added the fabric. To center it, I used the same technique as for pie crust. Fold the fabric into quarters and then center the point of the circle. Unfold, and voila!

I like how the shadow from the screen makes the table look like a peace sign. Groovy.
High tech measurement technique, y'all.


Now, to smooth out the bubbles in the Modge Podge, you can buy a special tool. Or you can pull an empty wine bottle out of the recycling bin and use it like a rolling pin. Your choice. Me, I think that a nice cabernet adds a bit of class to the whole operation. 

Reduce, Reuse, get hiccups.
The Modge Podge goes on white but dries clear.
After it was smooth, I added two coats of the Modge Podge over the top of the fabric. It works as a sort of lacquer to hold it down and to prevent fraying.

Tree stump outdoor table

This sweet little tree stump table was the result of a complete whim.
Down the road from my house, there's a path where we like to ride our bikes. There's a dead-end street and some woods along it, and it has become a dumping ground for the local landscapers. I had noticed some cool palm tree stump segments of varying heights and thought that they would look really neat grouped into 3. I wanted to use them for room decor or an outdoor side table.

Cue me sliding down an embankment in flip flops and shorts to liberate some tree stumps into the back of my SUV. I keep forgetting about the BUGS in Florida, though. Every stump that I lifted up had become home to zillions of ants, beetles and other creepy crawlies that made my skin twitch just looking at them. I did manage to find one that had landed on its end on top of a dry spot. It was somehow bug free. Trying to get back up said embankment in flip flops while lugging a stump would have been rather entertaining for anyone who happened by. I layered the trunk space with some plastic bags that I keep in the car and threw the stump in.

My original idea of just using the stumps as they were didn't seem as good now that there was only one. I had to rethink my plan.

I had some scrap OSB, so I fashioned a very high-tech compass (a pencil, nail, and piece of knitting yarn) to draw a circle on it. I then used the stump as my workbench and cut the circle out with my jigsaw. I thought it would be a very straightforward job of screwing down the tabletop, but it turns out that palm wood is very porous and the screws just pulled right out again. So, I resorted to good old Gorilla Glue, and that worked brilliantly. I'm guessing that any other wood would probably be fine with screws, but the glue was so easy. It's held up for two months now in hot, humid weather.

Here's the table before decorating (pardon the night shot):

I'll cover the table top how-to in a separate post.

Pallet outdoor bench

I have a lovely lanai, but until recently it was devoid of anything except scrap wood, pallets and bikes. It seemed like such a waste of an outdoor spot.

I was inspired by some of the pallet benches that I had seen while browsing, and decided to attempt one from Cherry Blossom Kind of Life. I say "attempt" because it didn't quite fit together the way I had hoped. Here's the after:
The lesson that I learned the hard way from this project was that one should put together the supports first. I assembled the frames for the seat and back, then tried to attach the arms. Since I was doing this by myself and the stinking thing is almost as long as I am, it didn't work very well. If you look closely, you can see where I cheated on the front right leg (left side of the picture) and added a little block of wood to help support the seat frame.

My pallets were rather uncooperative when it came to disassembling them, and a lot of the boards had bits that were cracked and had to be sacrificed with the saw. I wanted the back to be high so that tall people could lean back comfortably. Unfortunately, I didn't have enough boards that were long enough, so I decided to alternate them with short ones. The result is functional, and pretty comfortable, but it's not a very elegant solution. Rustic or craptastic? You decide.

Monday, April 01, 2013

20 minutes flat

I HATE ironing. When I buy clothing, my number one requirement is that it looks like it won't need to be ironed, ever. I've watched my sister-in-law spend literally hours every week ironing, and I think she's insane. But, she probably thinks exactly the same thing when I whip out my knitting needles or my paintbrush and sander.

Unfortunately, ironing is something I still have to do occasionally. It seems silly even saying it out loud,. but for me the worst part is dragging out the ironing board and wrestling it open. I saw this idea for making a dryer-top ironing board when I fell down a link black hole. I just had to make one.

Luckily, I had all the materials on hand as scraps from other projects. I had leftover foam from my pallet bench, and scrap OSB from building my bed. I had squirreled away some fabric fat quarters from a JoAnn clearance sale, so I put one to good use.

It just so happened that I had a scrap of wood that was a good size for the top of my dryer, still leaving room for my laundry soap. It also fitted my fat quarter nicely. I found a fantastic iron in great condition at Goodwill for $2.16 to go with it.

Here's the result. I've even used it several times. I've amazed myself.

Feeling Blue...and White

The Goodwill by my new place is amazing. I scored a solid wood coffee table with matching end table for $25. Both have little drawers, which are useful. Currently, the drawer contains a remote for a TV that I was given but isn't hooked up to anything and the IKEA catalog. My friend also gave me a beautiful Restoration Hardware catalog for inspiration. I was inspired to cut it into strips and weave them into coasters, because homemade coasters are the only thing I can afford out of it. Anyway....


Before
After


Here is the finished result of the coffee table makeover. Total time investment was about 8 hours over 3 evenings. The primer and white paint were left over from my sorbet kitchen table, so the only cost was the small tin of navy paint. If you want to see the step-by-step shots, keep reading.

I know, I know. The lamp is grannylicious, but hey. It was free and has a matching one. You can just see the sofa in the pic though, and that beauty was only $65.

The coffee table had a layer of grime on the edges and a few deep gouges, but was in good shape. The end table was even better. I sanded them down roughly and used a bit of wood filler to smooth out the worst ruts. When it had dried, I used a finer gauge sandpaper to smooth the filler and wiped it all down. Then, the tables got a coat of primer applied with a brush. The midget even had a go at priming the top. A girl is never too young to learn some DIY skills.
Deep gouge. Ouch.
Primed and ready. 

Making sure that the white and blue had crisp edges was the trickiest part. Because I have to cut costs, I decided to forgo masking tape and cut in the colors with an angled brush. I painted the navy portions, being careful to cut in cleanly with the edge of my angled brush. I waited until the blue had dried completely, tackling the white application the next night. I flipped the table onto its top to paint the first coat of whit on the legs to ensure that I didn't miss anywhere. On the third night, I braved doing a second coat of both colors without allowing the first color to dry. It worked pretty well, but it was harder to keep the corners clean. The drawer knobs got poked into a box that I pulled out of the recycling bin so that they could be placed upright to dry.
Knobs. Heh heh. I said knobs. 

Anticipating feet and drinks on the tables, I got up early in the morning and applied a coat of spray clear coat to protect them. What do you think?


Outta my way, old man!

There's something about a kitchen that makes me want fresh colors. Or colours, depending on from  which country you're reading. I scored this table set due to the quick reactions of my friend. She was perusing the local amazing Goodwill superstore and spotted it while I was busily rummaging through an assortment of headboards. She saw an old man heading toward the table, so threw herself on top of it, sliding Bo Duke style, and snagged the tag before he could get there. We only felt guilty for a second.

The table was a scratched up, flat black. But it came with four chairs, it's solid wood, and it was $30. Sold.

Anyway, I figured that since I don't have any stuff to clutter up my space, I'd need some color to avoid things looking clinical. Plus, the table was already an ugly color, so if I screwed it up then it wouldn't be any worse. I chose paint in an orange sorbet and a lime sorbet. I think it turned out pretty cute. Don't look too closely, because I've still got some touching up to do. Here's the "after" picture. For those of you that are as weird as I am and find the in-progress tales compelling, keep reading.

Sorbet kitchen table.


When I got my bargain table out into the harsh light of day, it was apparent that whoever had owned it was a family of filthy pigs. I moved the table out onto the patio. I had to chisel off coagulated and hardened food from every surface and crevice with a screwdriver and then scour it off with sandpaper. A maggot actually fell out of some of the detritous. I followed it up with a nice dose of Lysol for good measure.  Oh well, soldier on, right?

Before: Sanding the crap off of the table.

Once the table was clean, the sanding began. My friend and my daughter both gallantly spent ages helping me out, but they both wanted to sand the paint completely off and take it back to the bare wood. At this point, I was pining away for the electric Mouse sander in my house 5,000 miles away. Since I was going to prime and paint everything, I decided to just rough sand by hand to get the loose paint off and give the primer something to adhere to. I'd read so many people's raving blogs about spray primer, but it didn't go as far as I wanted.

A can of spray primer doesn't quite cover it.
Sanding the chairs


Stripping is such a messy job.
Once I started stripping (the paint, much to the relief of the nieghbors), it was obvious that the chairs has been painted twice. They'd been painted black on the base, but white on the tops. That must have looked bad, because the white was later covered with black. The paint was sort of gummy and hard to sand, so I splashed out on some aerosol stripper. What a mess. Since all of my tools are far, far away, I sacrificed a plastic spatula that had a chip in it for scraping off the paint sludge. This was not effective.
I wanted an orange sorbet color, and the one I found was actually called orange sorbet. Perfect.

I used a spray primer on the table and then used an angled brush to apply three coats of paint to the top of the table over the course of several evenings while sweating my proverbial bollocks off. It's still 90% humidity and 85 degrees, even at 10pm. The chairs got Kilz applied with a foam brush. Two were spray painted white, and two were painted with the lime sorbet. I'd just like to add here: Painting spindles is a gigantic pain in the arse.

You know how the back of the paint cans always tell you about ideal temperature and painting conditions, blah blah blah? Apparently that crap means something. Paint will not dry in conditions that create swamp ass. It just sort of bubbles and runs. After 2 days, I had to move my still-tacky chairs in so that the air conditioner would dehumidify them a bit. Hence the touch-ups that I need to do.

After a spray of clearcoat on the table top to ensure that daily wiping won't destroy my paint job, the table was good to go. all in all, the project probably took me 5 or 6 evenings, some with 5 hours of work, some with just an hour. I'm quite happy with my pretty little table. Next up, the coffee and end tables. I just need to gear myself up for another round of sanding and painting. Yee hah. Maybe next week.

A Whole New World

This is repost from my other blog, but it gives you an idea about why this blog was started:

I'm not a commuter anymore, so it's time for the blog to have a fresh focus. Drawing from my current situation, it's about starting over and making a home from very little. Or, more concisely, trying to make 
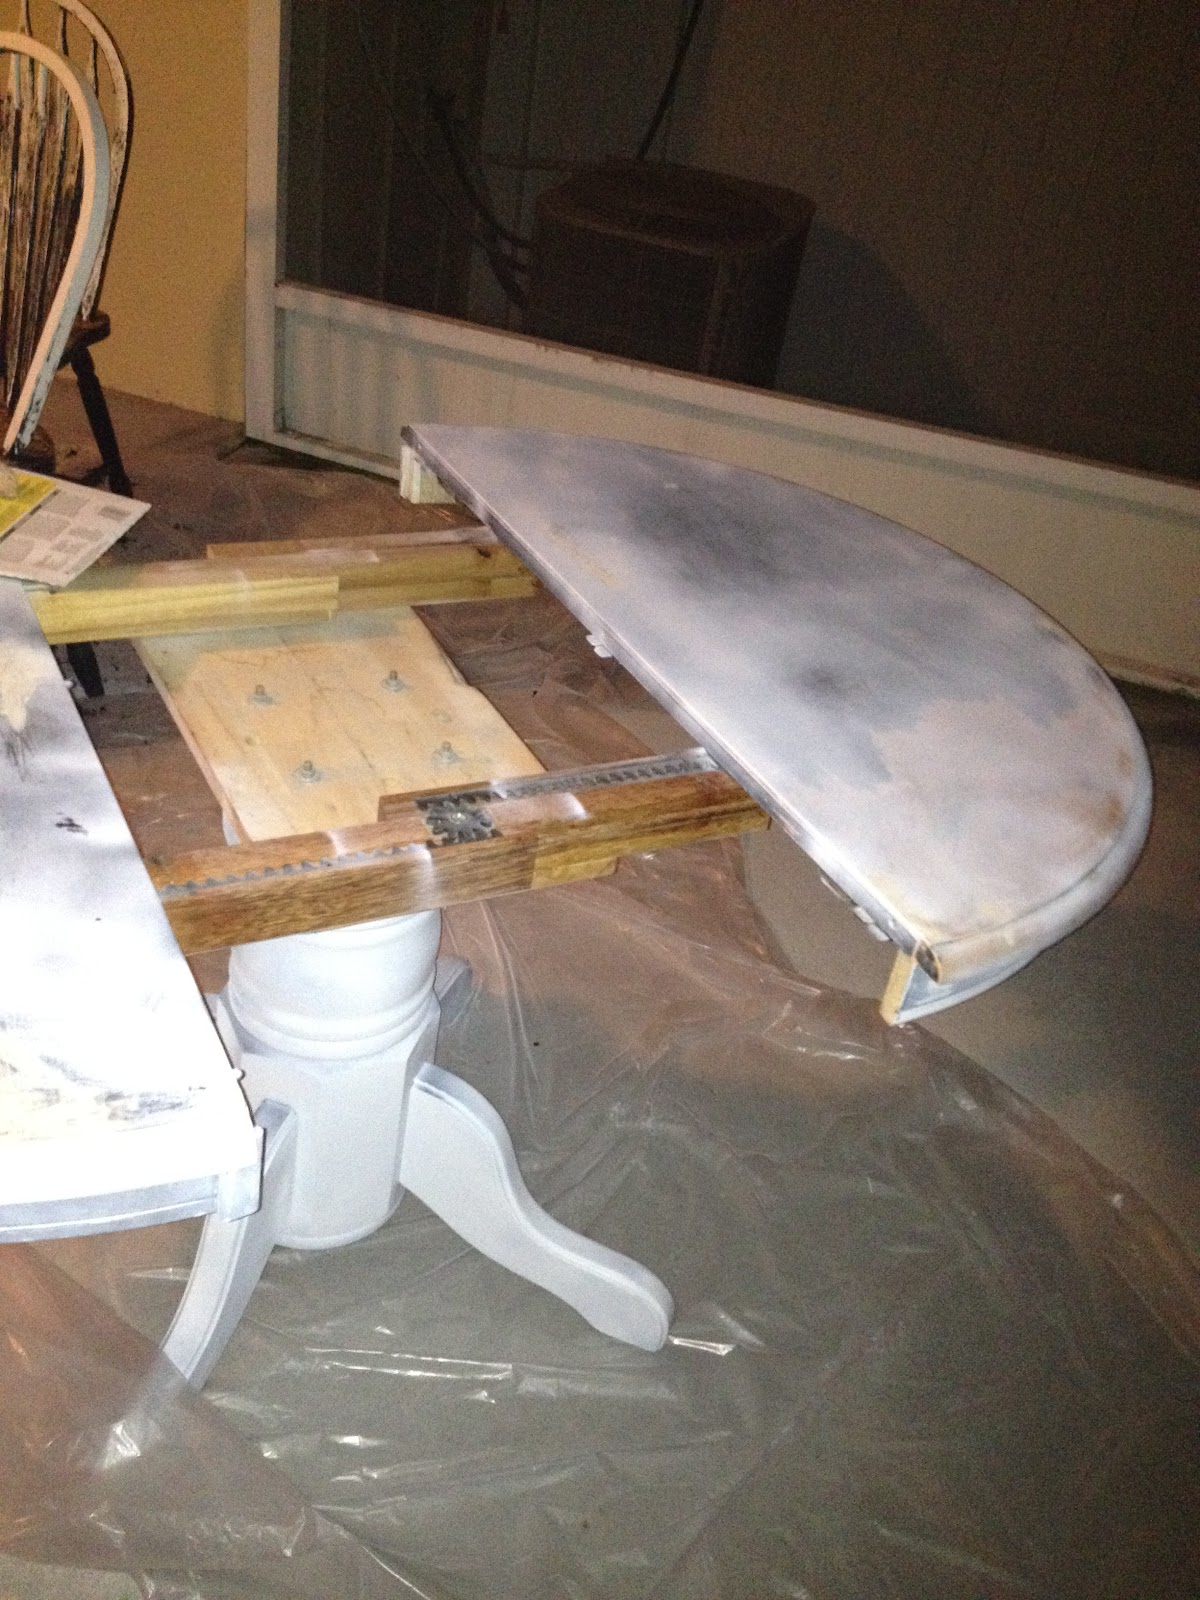
frayed ends meet without it being too ugly. So, I'll be blathering on about furniture makeovers, bargain hunting, and the strange shit I observe being a stranger back in my own land.

It's now been just shy of 4 months since I've had to take the train journey from hell. It took an international move and total life upheaval to rid myself of the accursed trains, but it was worth it. We now live in a sunny place where weird stuff happens regularly.

Here's the quick and dirty version: After living in England for the last decade, I moved with my young daughter and 2 suitcases each to start a new job. It's probably no coincidence that we did so without any savings, considering that between trains and buses, the commute was costing over £5000/year for the last 4 years. The transition hasn't been easy. We've temporarily left behind Mr Commuter, the dog, our friends and family, and all of our stuff. It hasn't been easy, but the two of us are lucky to have a pair of amazing friends who have taken us into their family. We stayed with them for months while I tried to sock away enough cash to get us started and they have been unbelievable in helping us to start from scratch.

Even when eschewing "things", there's a lot of crap that we all take for granted until it's not laying around the house anymore. In addition to the things that you might think of right away like beds, sheets, plates, and towels, there are lots of small things too. Dishtowels. Toilet paper. Screwdrivers. Scissors. Sponges. Toilet brushes. Pantry food. I could go on, but will spare you. Trust me though, this junk adds up. Throw a kid in the mix, and it's never ending. Over the last few months, I've been squirelling away various necessities and bargain hunting like mad.

Our friends here and their family have been incredibly patient and generous. In addition to letting us stay in their lovely, previously kid-free home for three months, they thought of all kinds of things that we would need. They set the midget up with lots of books and craft supplies so that she would have some things of her own when she arrived. They even knew that the school systems were slightly different, so they got her lots of ready-for-school activity books. We take a lot of cultural knowledge for granted - she struggled with math problems that involved money, because it's hard to add a nickel and a quarted when you have no idea what the hell that means or what they look like. How do you sort which object doesn't fit when you see an American football, a baseball bat, and a catcher's mitt? She's never seen those sports before. They got us a membership to the science museum and set her up with a week of summer camp there, plus so many other fantastic things, it is impossible to name them all.

 There were lots of things to sort out to get started. I saved up the down payment for a 14-year-old car. I am paying over the odds since I have no credit history in this country anymore, with the exception of student loan payments that are in default because I owe a third of my salary every month just to meet the interest payments. But, providing that the duct tape holding the car together works for at least the next 2 years, it should be okay. It will be paid off in about 15 months and then I can save the car payment money from my salary for the inevitable down payment on the next one.

Then, I had to find a place to live that was zoned for a decent school. If I was on my own, I could stay in a smaller and cheaper place, but I had to consider schools. We also need a place that is big enough to accomodate Mr Commuter working from home if his visa ever comes through, as well as the inevitable influx of welcome visitors from across the pond. Rental places mean rental deposits, so that was another thing to save for. There have been car repairs, a computer destroyed by milk, a smashed window, summer child care, and loads of other financial setbacks that seemed to suck up money at an alarming pace, but we have managed to get into a cute little townhouse and are making what started out as an empty place into a home.

Come visit the progress on junkjedis.blogspot.com